Posts Categorized “programming”

Fix Go compilation errors after update

After upgrading my Go 1.1.1 to 1.1.2, 9o fails to compile packages - or have dependencies - that are already compiled with errors like this:

specs/client/AppendingToAStream_test.go:4: import /Users/pjvds/dev/mygo/pkg/darwin_amd64/github.com/smartystreets/goconvey/convey.a: object is [darwin amd64 go1.1.1 X:none] expected [darwin amd64 go1.1.2 X:none]

The last part in the errors tells me that this is because the code has previously been compiled with Go 1.1.1. Which makes perfect sense since I just updated. After a short journey of trial and error I found the solution that worked for me.

Since building is very fast with Go, the easiest thing to do is to remove the compiled packages.

rm -rf $GOPATH/{bin,pkg}

Happy coding!

Import a Go package from a private git repository

The go get command helps to download the packages to the right location for you. Currently this command does not support cloning a git repository over SSH, which makes it harder to retrieve private packages in an automated fassion. In this blogpost I want to share my solution for retrieving private packages from GitHub or Bitbucket from your build at wercker using deploy keys.

Go dependencies are quite simple. All code should be available in the Go workspace. This means that you must have a copy of the source code of all your dependencies stored in the local file system. With the go get command you retrieve these from remote source control systems. Go knowns populair hostings services like GitHub and BitBucket. It supports git, mercurial, svn and bazzaar.

No SSH support

Although the documentation states otherwise, the current version of go does not support the retrieval of code from private repositories via SSH. We need to do this manually in the build pipeline. It will allways try to retrieve the code via https. Https is not the protocoll you want to use for this because it requires a username and password from an existing GitHub or BitBucket user account which will also effect the limits of your plan. When using SSH you can use deploy keys to gain access to a repository.

Deploy Keys

A deploy key is simply a password-less SSH key that grants read-only access to a repository. Both GitHub and Bitbucket support deploy keys by adding the public part of a key. Deploy keys have the following features and limitations:

  • Deployment keys do not apply to your plan limit.
  • You can add the same deployment key to multiple repositories.
  • The deployment key must be unique — it cannot also be associated with an account.

Adding a key to your application

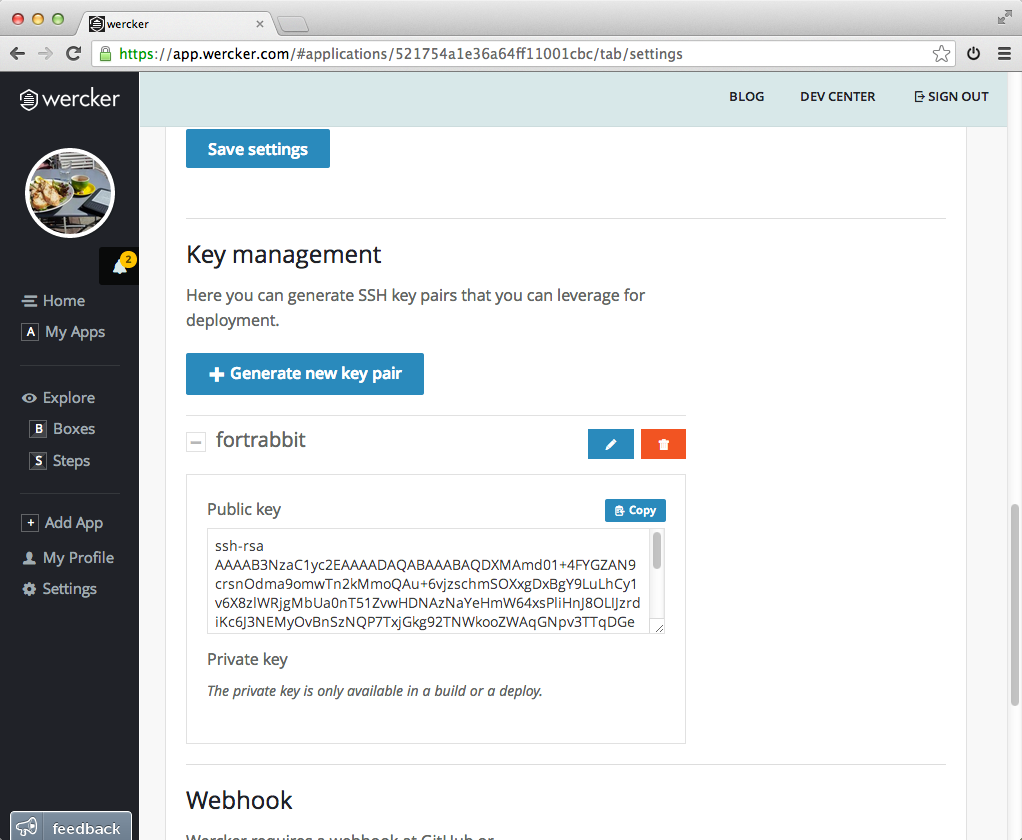
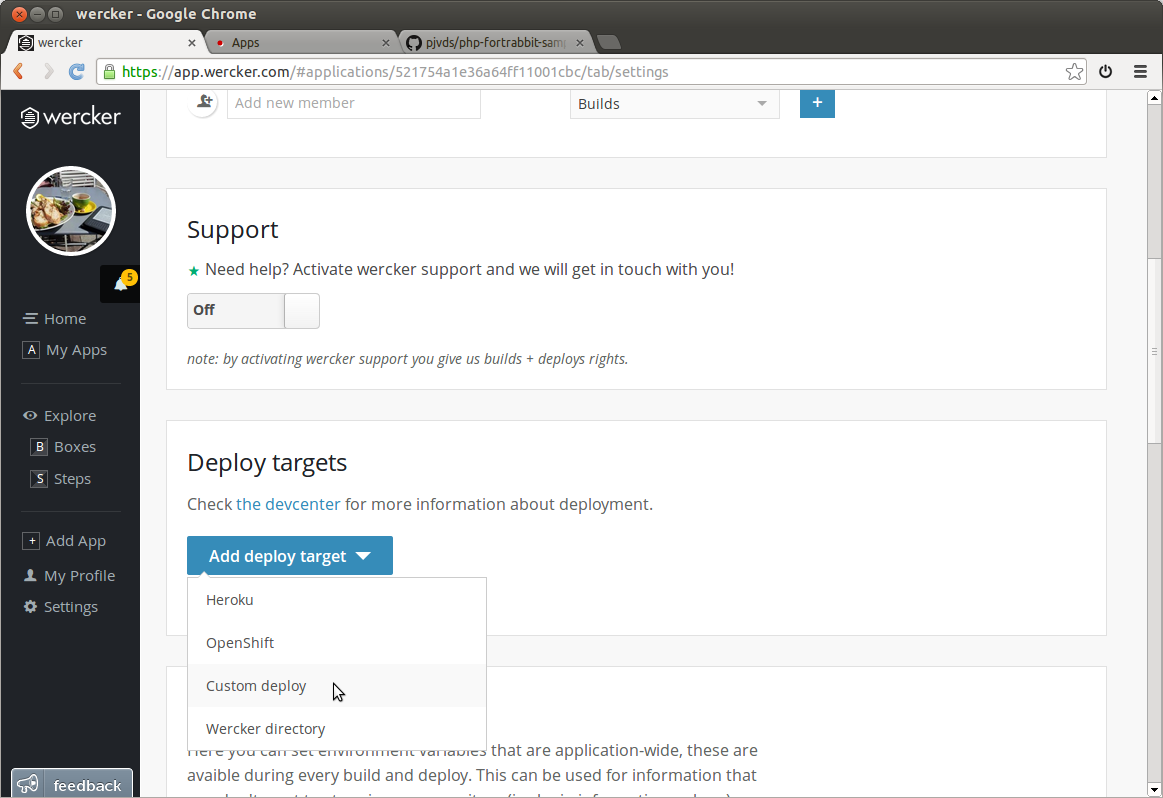
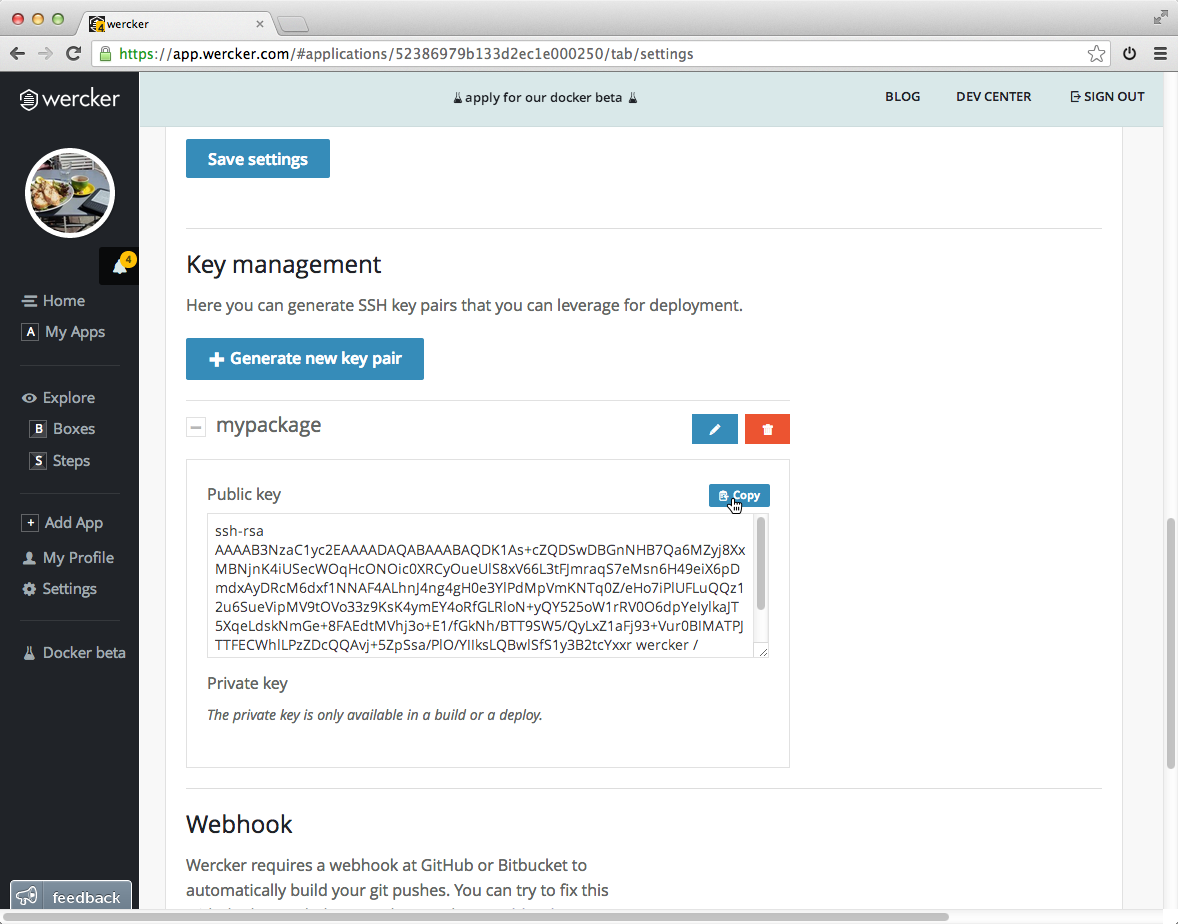
Wercker allows you to generate SSH keys for your application, which we can be used as a deploy key. Open your application on wercker and go to the application settings tab. Here you find the key management section. Use the generate new key pair button to create a new key.

create ssh key at wercker

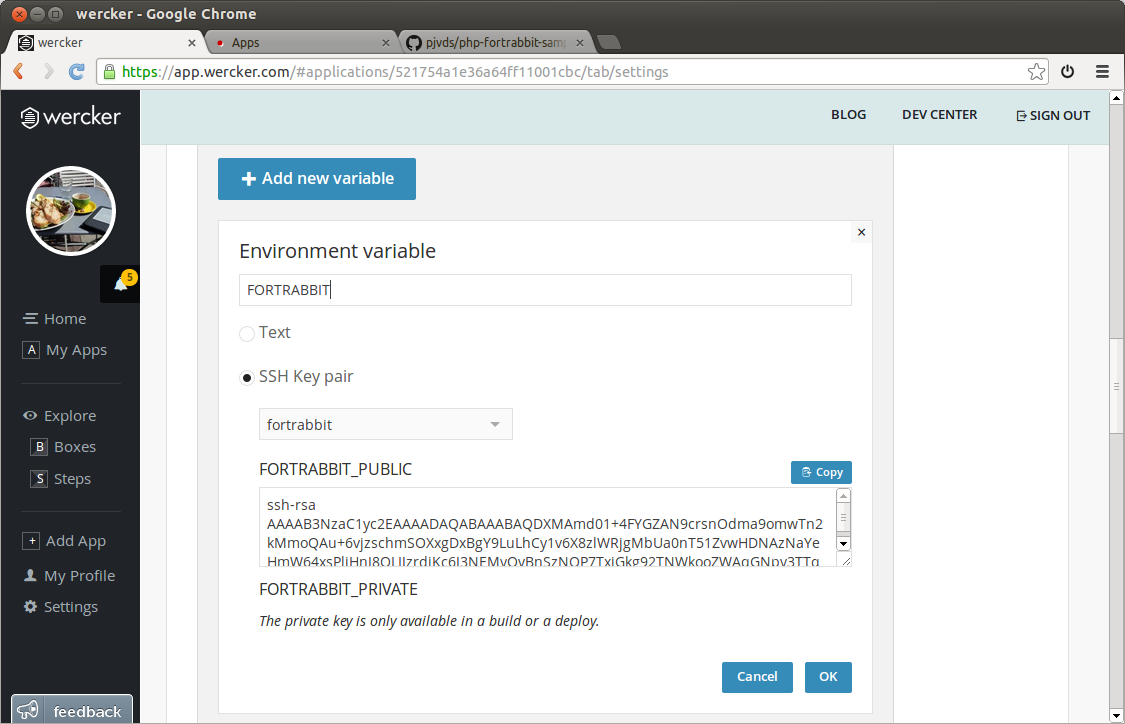
Add variable for key

Before we can use the key in our build pipeline, we need to expose it as a variable. This can be done in the pipeline section of the application settings tab. Press the add new variable button, pick the SSH Key pair option and select your key.

pipeline variable

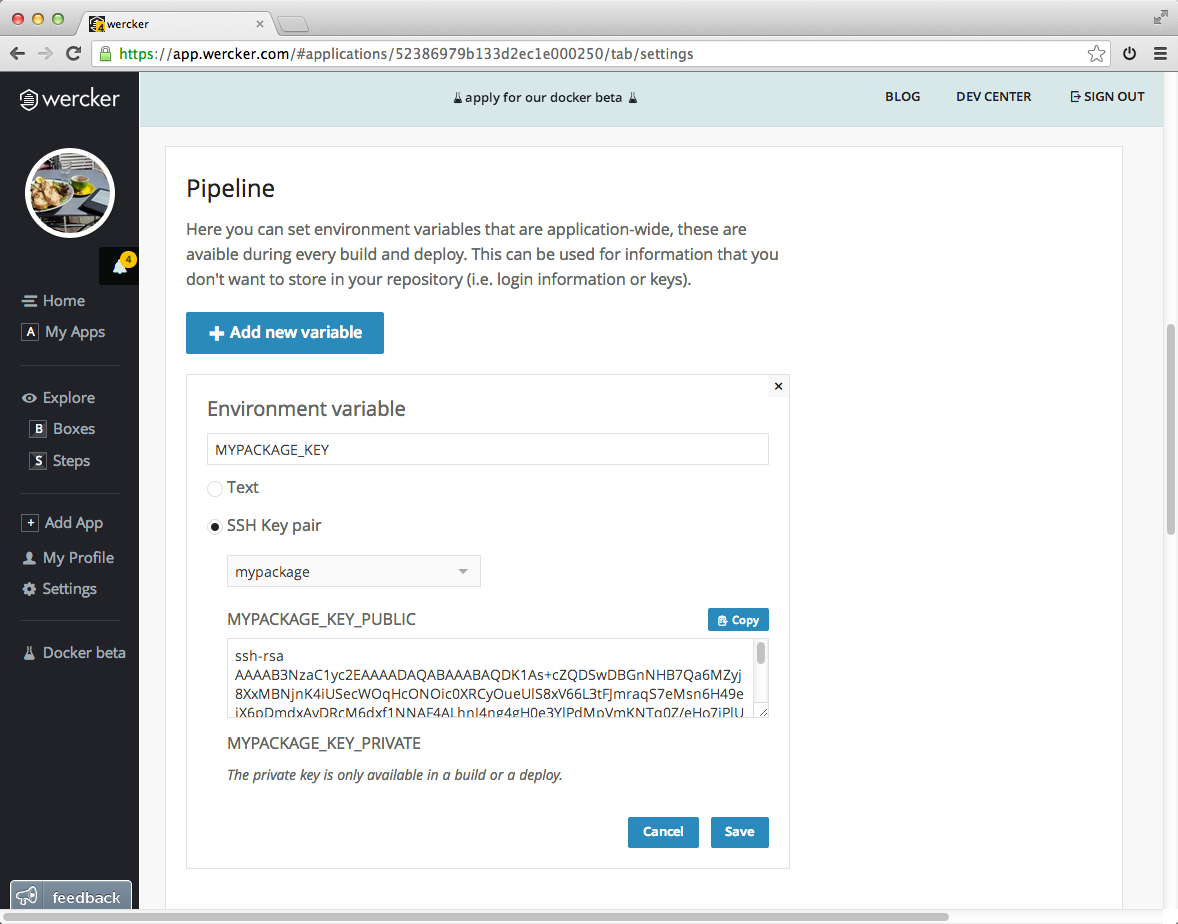
This will expose the key as two variables, in my case: MYPACKAGE_KEY_PUBLIC and MYPACKAGE_KEY_PRIVATE. The first one holds the public part of the key, and the latter the private part.

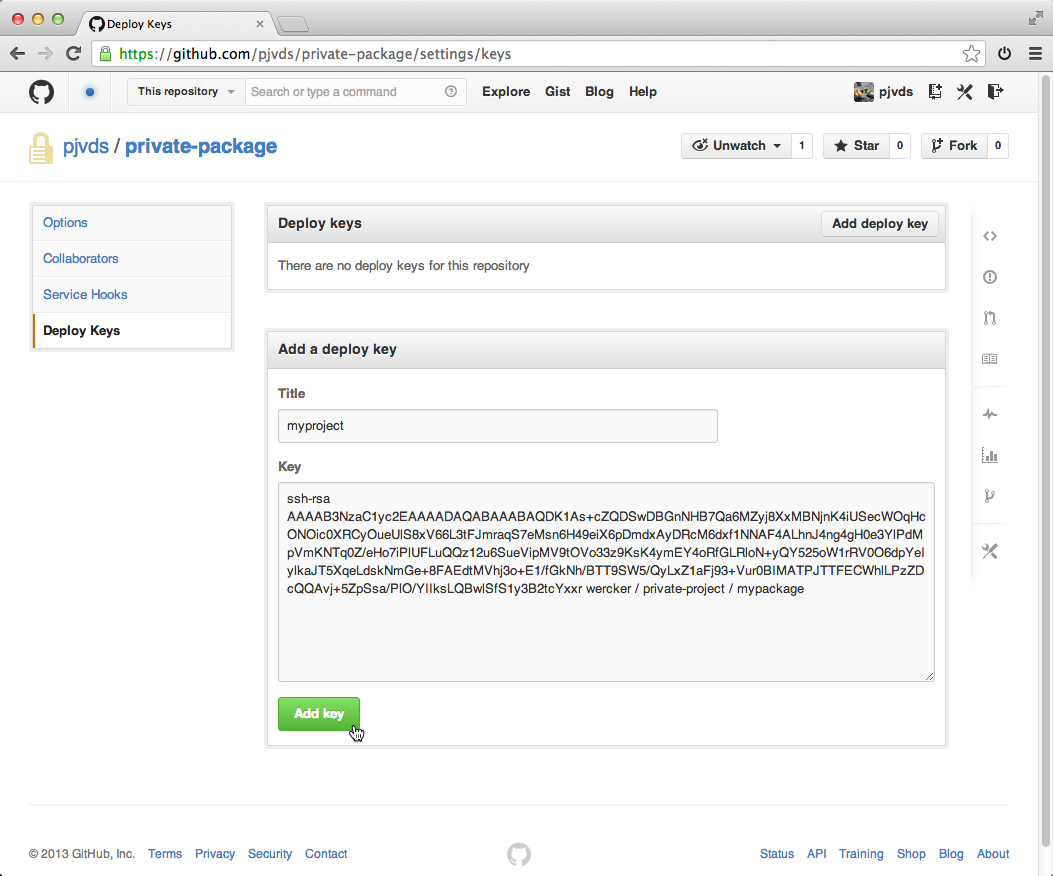
Add key as deploy key

You can copy the public key from the previous step and add this as a deploy key to the private git repository that contains the package. This option can be found in the settings page of your repository at either GitHub or Bitbucket.

deploy key

Add key to build pipeline

We can leverage the add-ssh-key step to write the key as an identity file.

box: wercker/golang
build:
  steps:
    - add-ssh-key:
        keyname: MYPACKAGE_KEY

Getting the dependency

Due to a bug in go get we cannot get the private package via ssh. Until this is fixed we need to clone the repository ourself. As said in the intro, an import path denotes a package stored in the local file system. If we clone the package into the correct location, go get will see it is already installed and will not try to get it. It will also be able to update the package, since go get will execute a git fetch with the default remote that is added by our clone.

To clone the package to the correct path we need to understand the structure for code hosting services. Here are the conventions for GitHub and Bitbucket, a full list is available via the go help remote command:

Bitbucket (Git, Mercurial)
        import "bitbucket.org/user/project"

GitHub (Git)
        import "github.com/user/project"

These import paths are relative from the $GOPATH/src/ path. Here is an updated version of my wercker.yml that clones the private package into the correct directory:

box: wercker/golang
build:
  steps:
    - add-ssh-key:
        keyname: MYPACKAGE_KEY
    - setup-go-workspace
    - script:
        name: Clone private packages
        code: |-
          git clone git@github.com:pjvds/private-package.git $GOPATH/src/github.com/pjvds/private-package

The GOPATH environment variable is created by the setup-go-workspace step.

Final pipeline

We can now execute a go get to get the rest of the dependencies, if any. Executing a go build and a go test finalizes the build pipeline. Here is the final wercker.yml I used:

box: wercker/golang
build:
  steps:
    - add-ssh-key:
        keyname: MYPACKAGE_KEY
    - setup-go-workspace
    - script:
        name: Clone private packages
        code: |-
          git clone git@github.com:pjvds/private-package.git $GOPATH/src/github.com/pjvds/private-package
    - script:
        name: Go build
        code: go build -v
    - script:
        name: Go test
        code: go test -v

You could also execute only the go test command in the build pipeline, since it will also build the code if needed. But by spliting these steps you better understanding which of these two failed.

Earn some stickers!

Let me know about the applications you build with wercker. Don't forget to tweet out a screenshot of your first green build with #wercker and we'll send you some @wercker stickers.

Deploying from wercker to fortrabbit

Today we got a support ticket from a user that wants to deploy his PHP application to fortrabbit, a PHP as a service provider. To help this customer I decided to create a small sample app and try to deploy it to fortrabbit. This blogpost describes the steps I took. I will give you a short summery right away: It was pretty damn easy!

The PHP application

I have a very simple PHP application that echo's some cities in json format from the index.php. Here is the content of index.php:

<?php
$cities = array("Amsterdam", "San Francisco", "Berlin",
                "New York", "Tokyo", "London");

header('Content-Type: application/json');
echo json_encode($cities, JSON_PRETTY_PRINT);
?>

It also contains some tests and has a small wercker.yml that defines the build pipeline. Here is the content of wercker.yml:

# Execute the pipeline with the wercker/php box
box: wercker/php
build:
  steps:
    # Install dependencies with composer
    - script:
        name: install dependencies
        code: |-
            composer install --no-interaction
    # Spin webservice and serve site
    - script:
        name: Serve application
        code: php -S localhost:8000 >> /dev/null &
    # Execute integration tests with php unit
    - script:
        name: PHPUnit integration tests
        code: phpunit --configuration phpunit.xml

Generating SSH Key

Wercker has the ability to generate SSH keys that are available from the build and deployment pipeline. These can be generated from the application settings tab at wercker. I generate a key with the name fortrabbit and wercker shows me the public key.

generating an ssh key at wercker.com

Adding public key to fortrabbit

To be able to git push deploy to fortrabbit we need to add the public key part of the SSH key pair to our application. This can be done in the manage view of your application via the application overview.

application overview

Navigate to the git tab.

git tab

Enter a name for the git user, I picked wercker and paste the public key part into the big text area.

git tab

Hit the Save Git Users button to confirm.

Deployment pipeline

I have played a bit and came up with the following deployment pipeline that I added to the wercker.yml:

deploy:
  steps:
    - add-to-known_hosts:
        hostname: $FORTRABBIT_GIT_HOST
    - script:
        name: Setup git repository
        code: |-
          # Remove existing git repository if exists
          if [ -d ".git" ]; then rm -rf .git; fi

          # Configure git user
          git config --global user.name "wercker"
          git config --global user.email pleasemailus@wercker.com

          # Initialize new repository and add everything
          git init
          git add .
          git commit -m 'Deploy commit'

          # Add fortrabbit remote
          git remote add fortrabbit "$FORTRABBIT_GIT_REMOTE"
    - script:
        name: Make .SSH directory
        code: mkdir -p "$HOME/.ssh"
    - create-file:
        name: Write SSH key
        filename: $HOME/.ssh/id_rsa
        overwrite: true
        content: $FORTRABBIT_KEY_PRIVATE
    - script:
        name: Set permissions for SSH key
        code: |-
          chmod 0400 $HOME/.ssh/id_rsa
    - script:
        name: Git push deploy
        code: |-
          git push fortrabbit master -f

Most steps should be self explaining, but here is what is it does in plain English:

* Trust forstrabbit git hostname, eq: `it2.eu1.frbit.com`
* Setup git repository and add all files to push
* Add SSH private key for authentication
* Git push deploy to fortrabbit

Add deploy target

The last step is to add an deploy target to the application at wercker. This can be done via the settings tab of the application:

add deploy target

I name it production, and enable auto deploy for the master branch.

deploy target basic properties

We can add environment variables to the deploy target to make information available during the deployment. I start by exposing the SSH key that I have added earlier:

add ssh key variable

Next I add the two text variables FORSTRABBIT_GIT_REMOTE and FORSTRABBIT_GIT_HOST, which I set to the values displayed on the git tab at fortrabbit.

Deploy!

Navigate to your latest build and choose deploy:

deploy

When the deploy is finish I proudly look at the running version of the application:

cities running at fortrabbit

Source: cities.eu1.frbit.net